There doesn’t seem to be any ramp up time for me when I start thinking about going back to work. It goes from a fleeting notion to a full blown hunt in a snap. Much of my time lately has been taken up with the construction of a job hunt. I have had a few minutes here and there, but it seems that once I get things organized and ready to work, I am tired or distracted by a phone call.
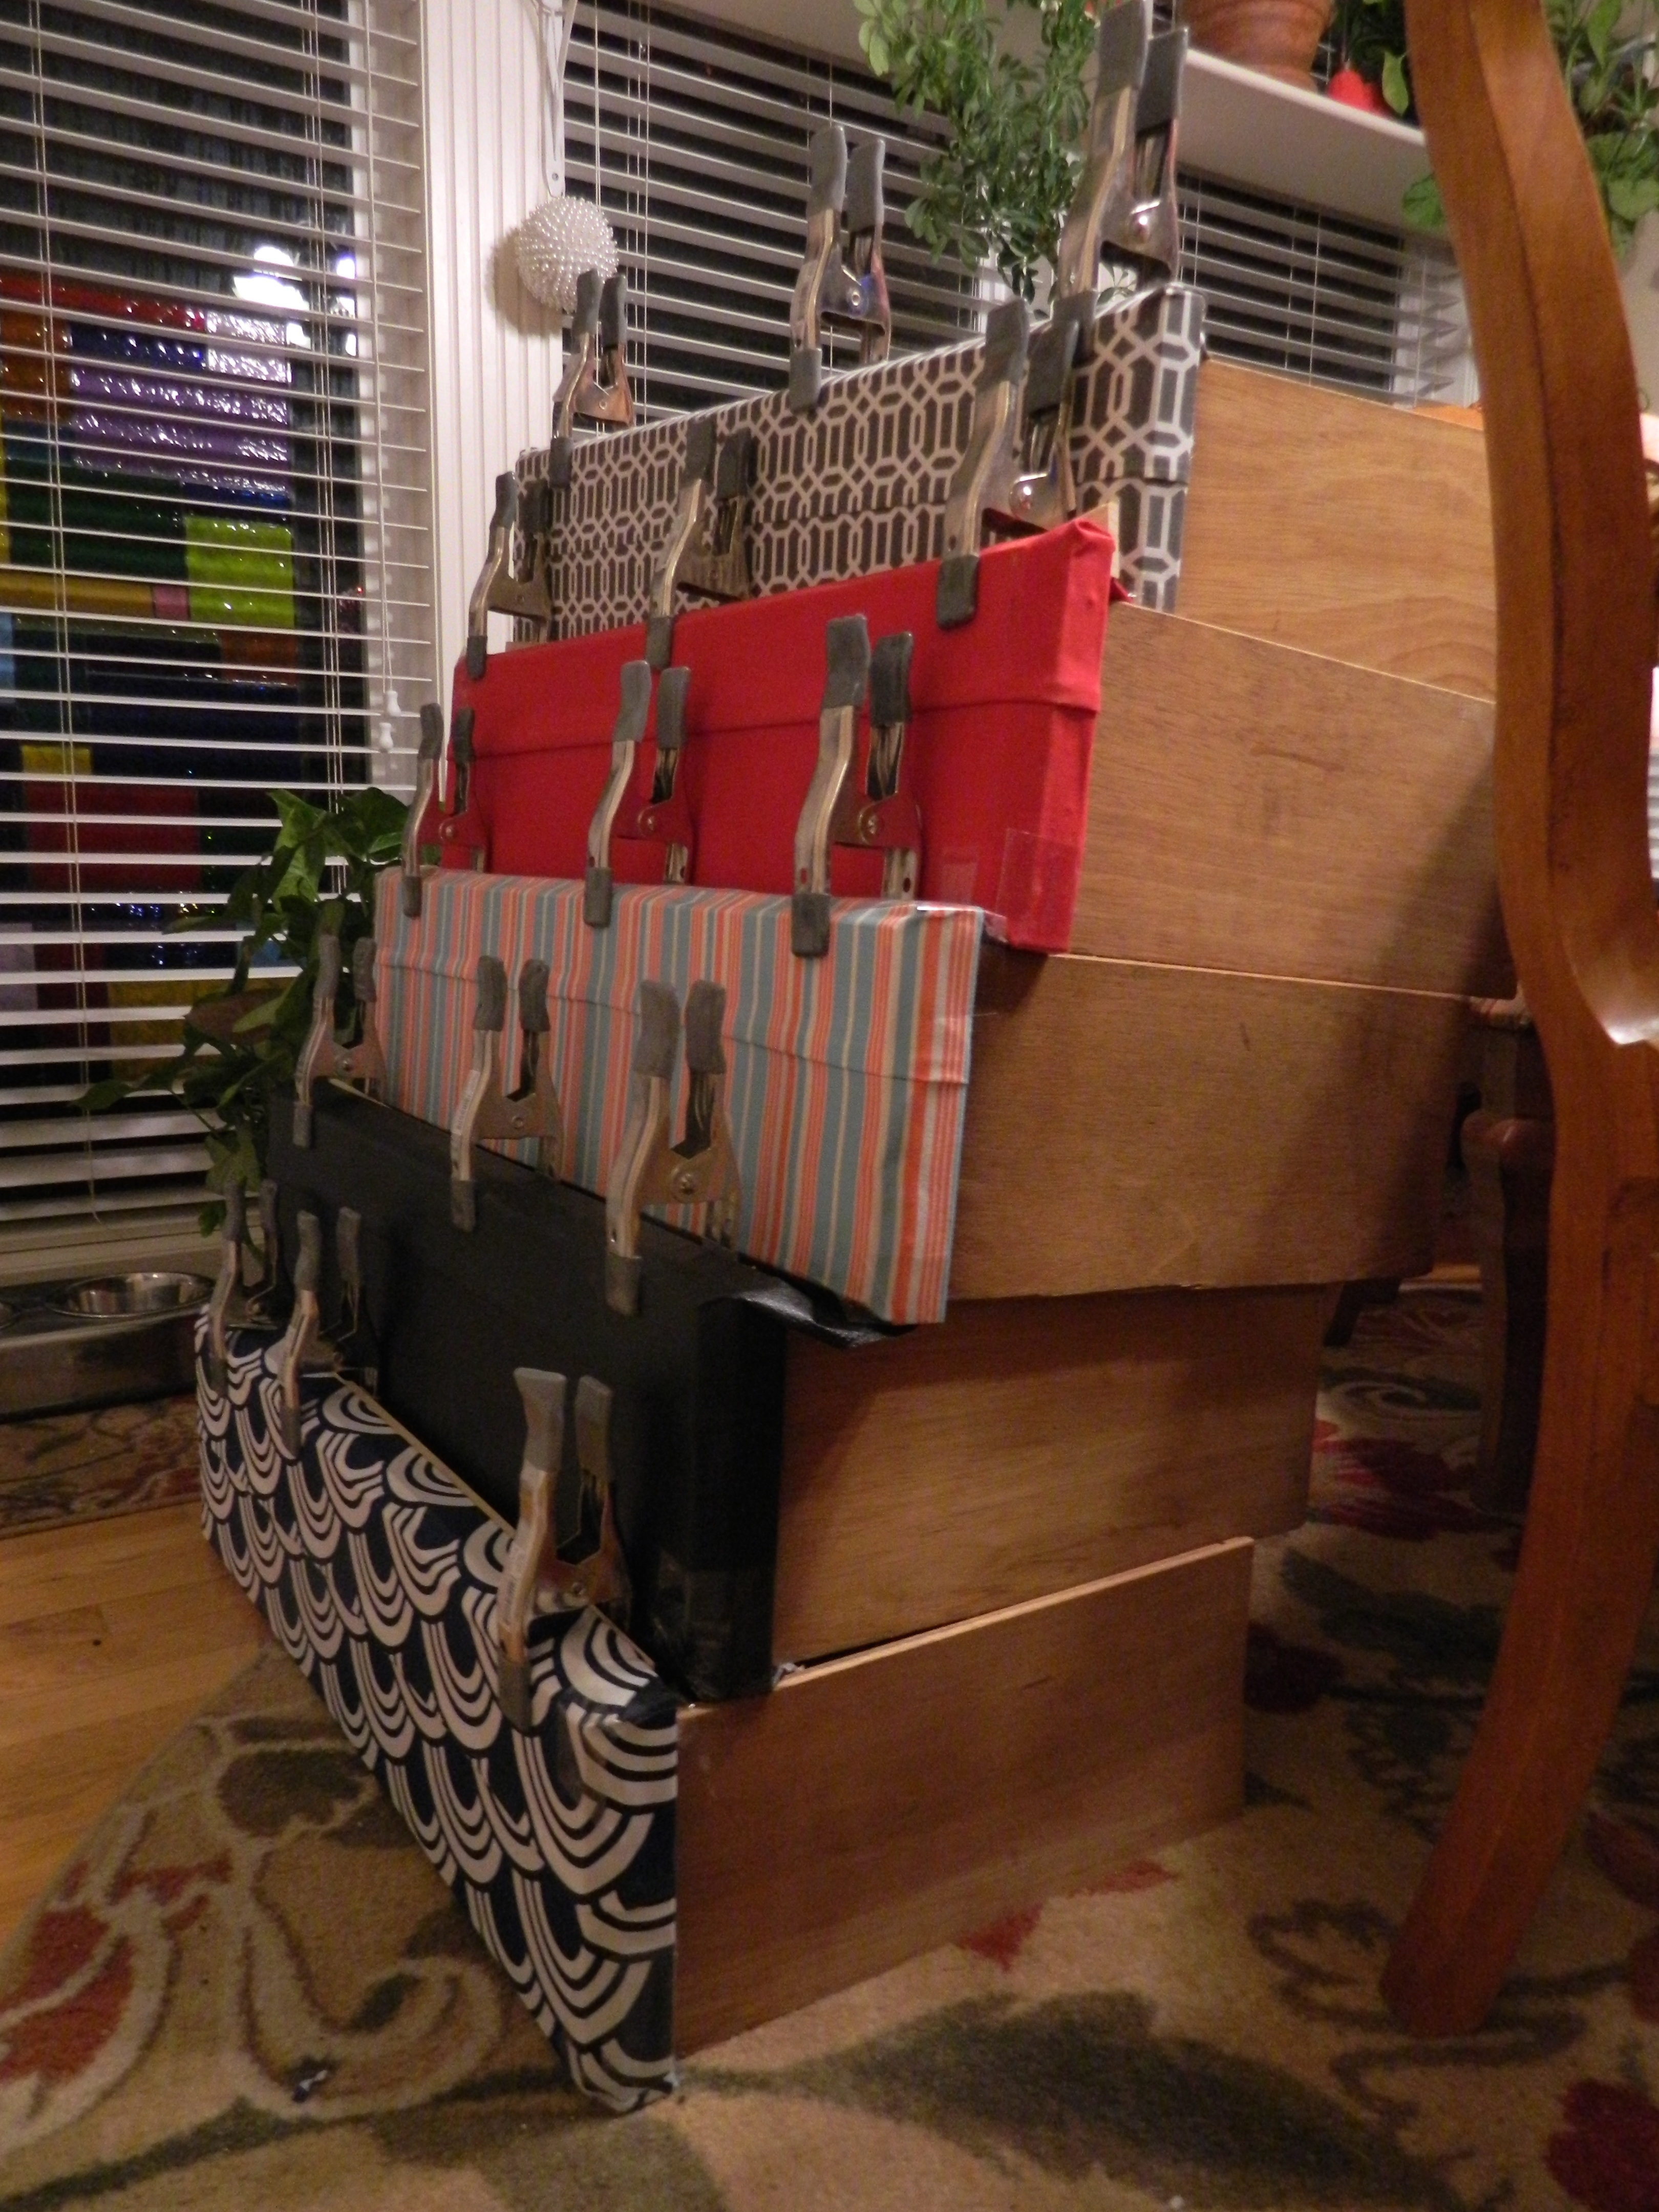
But, with that said, I have finished a couple of projects. The first one is something I’ve done before, but I never seem to get bored with the idea. The suitcase dresser is a very popular style, especially when you’re looking at a piece that may have damage or isn’t the highest quality. I’ve probably done a half dozen of this style now, and it always comes out great.
Although these are difficult to do, they tend to take some time to complete. Especially when the cabinet requires work as well. The Kid was much more involved in this one, as all of the drawers had to have fronts placed and supports both front and back of each drawer. One drawer had to almost be rebuilt from scratch, the one good thing is that all the pieces were there and just needed to be put back together.
I created a tutorial some time back, you can see it Suitcase Dresser Tutorial. I didn’t take many photos, since I’ve done the tutorial. I will tell you that if you have dedicated space to work on it, it helps. I did most of the work in the kitchen and dining room, and had to constantly move the drawers as I progressed with the work.
 I tend to work on it ‘assembly line style’, that is, I glue the fabrics on all of the drawers first, then glue the tucks on all four sides. Since each side needs to be clamped while is it drying, I can only do one side at a time. So I have to find a way to stack them out of the way while the glue dries.
I’ve gotten some things done with the container gardening… if you recall, I am attempting to grow tomatoes on the deck. So far, so good.
 That’s The Kid’s one stalk of corn, he wanted to try just one. He also planted corn in his backyard garden.
 We’ve had so much rain that everything is so green and the grass around the garden seems to have overtaken much of it. On this side, we attempted to build a small berm; the yard slopes such that when it rains, we end up with a little stream. I call it “a river runs through it’… and we’ve now figured out to avoid it, but with the ridiculous amount of rain we’ve had, it has widened. We experienced standing water around the seeds and we worried that nothing would ever sprout. But it does finally seem to have a foothold and now we have to watch the garden to make sure it gets the proper amount of water.
 And speaking of growing… I rescued this little violet when it was on its last leg about a year/year and a half ago. Someone had left it behind when they left their job and it sat for nearly two weeks without being watered or attended to. It was sad. I brought it home and repotted it in a larger pot in MiracleGro soil. And almost immediately this thing started sprouting new leaves and flowers. It has given me almost nonstop flowers ever since. Don’t those little purple flowers just make your heart smile?
 On the other hand (or should I say knee), I am now forced to ice or apply heat to both knees almost daily. The ice packs that I’ve been using have started to leak and I never really liked them anyway. They never really fit right against my knees, consequently, I did not get the full benefit. I had seen this ice packs using rice and you can both heat them up or cool them down.
 I actually had bought two bags of rice awhile back and with so little crafting time, I thought maybe if I just cranked out a few smaller projects, I might feel like I am accomplishing something. The project is simple enough… I would cut some muslin fabric and sew the edges together leaving one open side; to keep the rice from bunching up on one end or the other, I added some baffles. Then using soft fleece, I made each one a cover. I used velcro for the opening – this way if the covers get dirty or wet, then can just be thrown into the washer/dryer.
 So, I’ve also attempted to use up some of the denim that I cut up a few weeks ago. The main bulk of the denim is going into one or the other of two main projects: a braided rag rug and reupholstering a wing chair.
That leaves me with pant leg hems (2 per each pair of jeans), back pockets (2 per) and a waistband. So, I took the plastic bag of hems and sat down in front of the sewing machine and started sewing them together. Once I had a sizable piece of fabric, it hit me… this would make a terrific all purpose bag!
 I have always been a fan of canvas bags – we use them for groceries and I carry them into many places that I shop. I had found one that was about the right size of the piece that I had sewn, so opted to use it as sort of a lining. With it in place, I then used a waistband to finish the bag.
I found an older bag that had a beautiful handle and removed the rivets that were holding the handle in place. I cut four pieces of leather as the support of the handles. I couldn’t get the rivets to hold with my home kit, so I’ve opted to find some place that does leather work. I also want this place to stitch the bag pocket, as there is too many layers for my sewing machine. That is the thing with denim, it gets too thick very quickly. In fact, during this entire process, I broke 18 needles! And these needles were specifically for denim and other heavy projects. It is just as you work, the layers can add up very quickly… especially when you’re talking about seams!
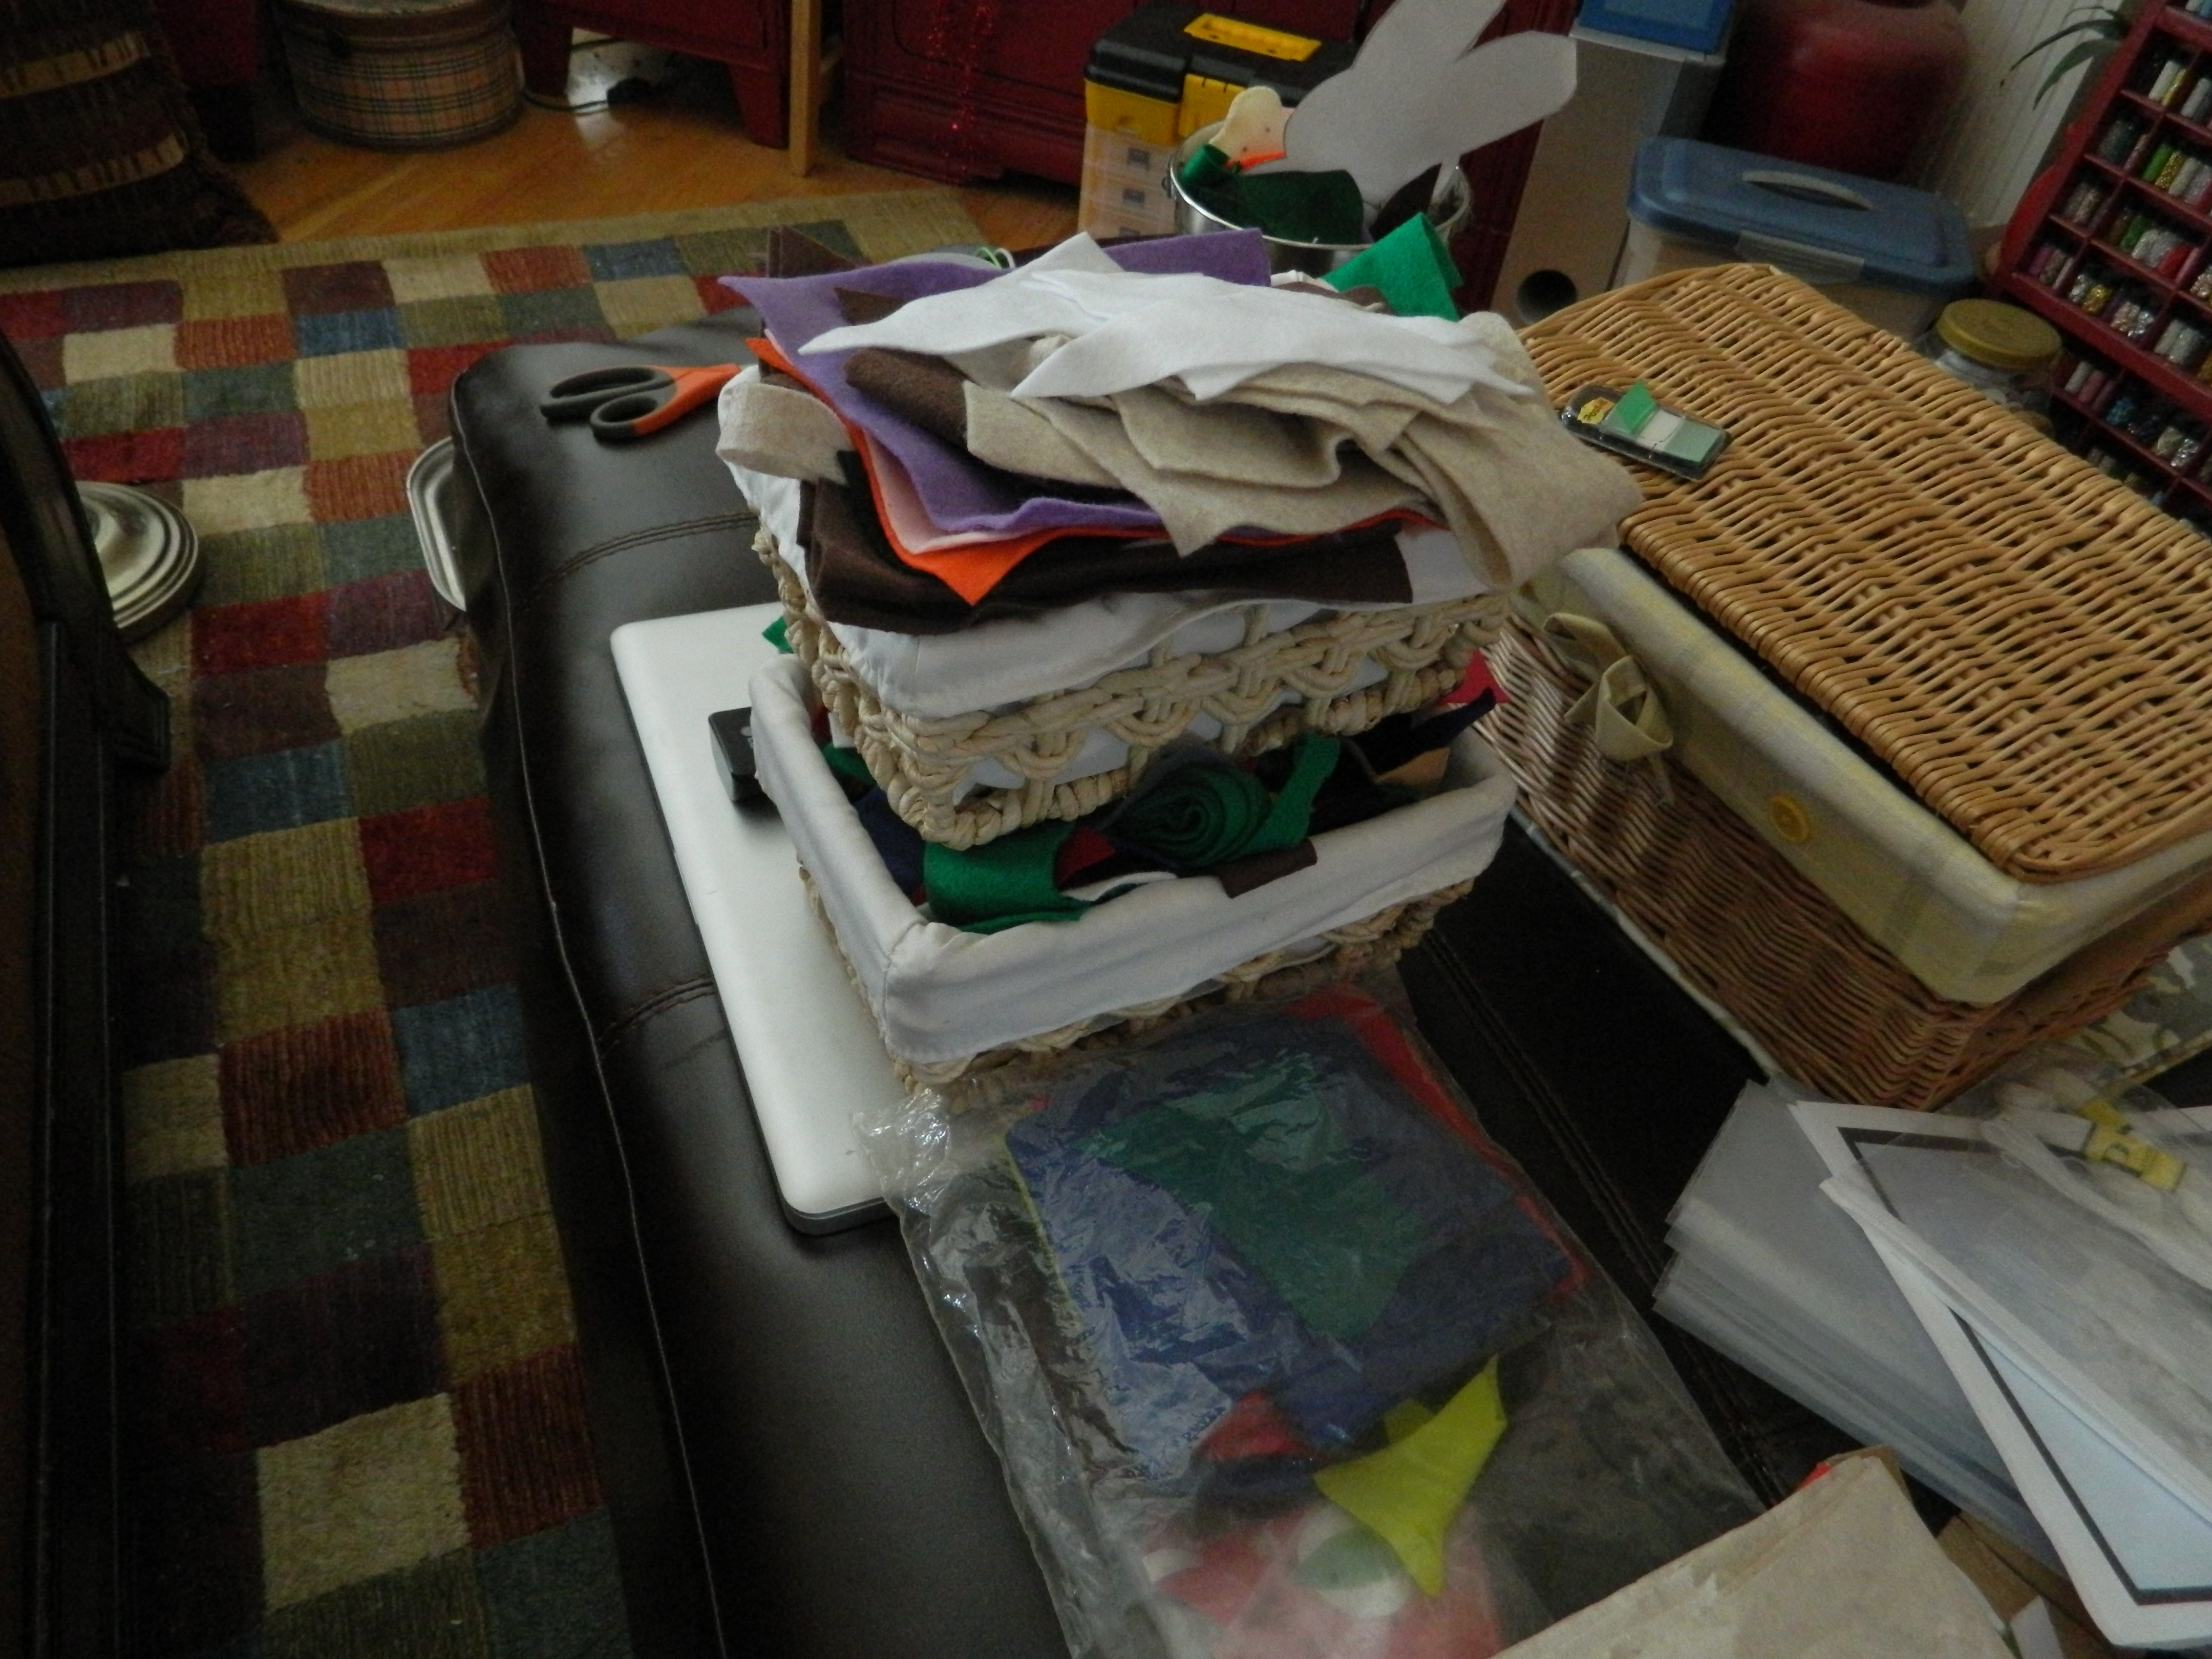
 On the other end of the sewing spectrum, I’ve been doing some hand sewing. I just start a with a circle of felt – whatever color I have on hand – and start adding stitches and have been using beads on many of the pieces. I didn’t have a specific project in mind, but while perusing Pinterest, I saw some pin cushions that looked similar. So, violá!
 Won’t these be the most adorable little pin cushions?
 And the great thing about this, is, this will give me a chance to use up much of my scrap felt. I can sit and watch television and stitch to my heart’s content. (Someday I will get back to working on my My Huge Cross Stitch Project. I just had to take a break from it for a while.)
 And the last little project… My son built this in his wood shop class a couple of years ago and I never knew exactly what to do with it. But working lately in my home office lately has shown that for the health of my knees, I need to have my feet elevated. And what better way to do it than with this little footstool! I painted it my signature red and I had just enough fabric to cover the foam that I added (material is left over from re-cover my dining room chairs and pillow covers for the couch). Don’t you just love it when things come together?
 So, I am going to leave you with another shot of my happy little violets!

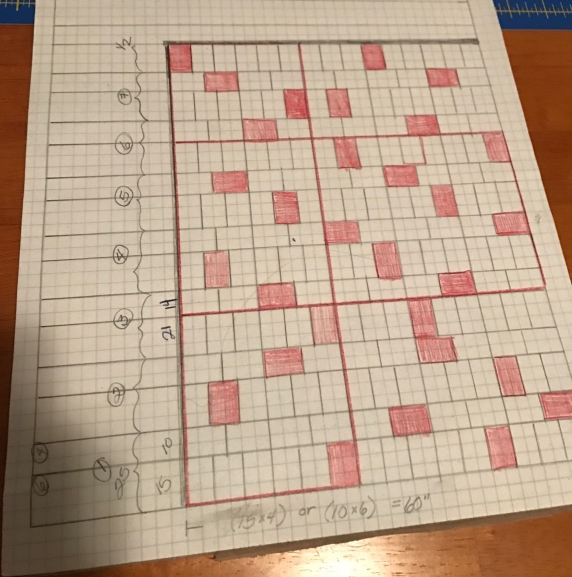 The original project was less ambitious but once I had it laid out on my cutting table, it appeared too small. So it was widened -65″ – and lengthened – 85″.
 The rectangles are laid out in rows that are end to end and alternative rows that are side by side. I thought that this might make for a more interesting and more pleasing layout.
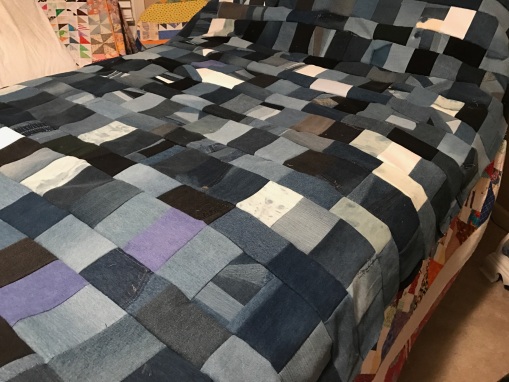 A closeup (before ironing) of the alternating placement of the rectangles:
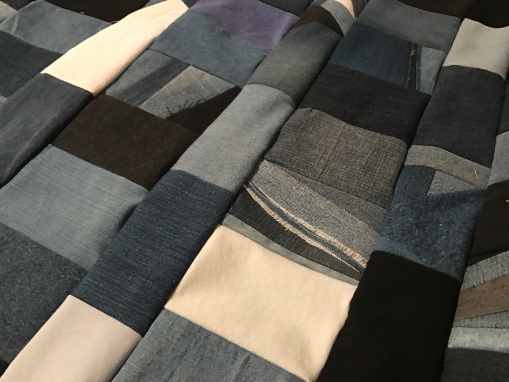 And I underestimated the number of those pieced pieces and now I have about 25 left… to small to make a quilt, but too many to just throw away. Sigh. Another project I guess!
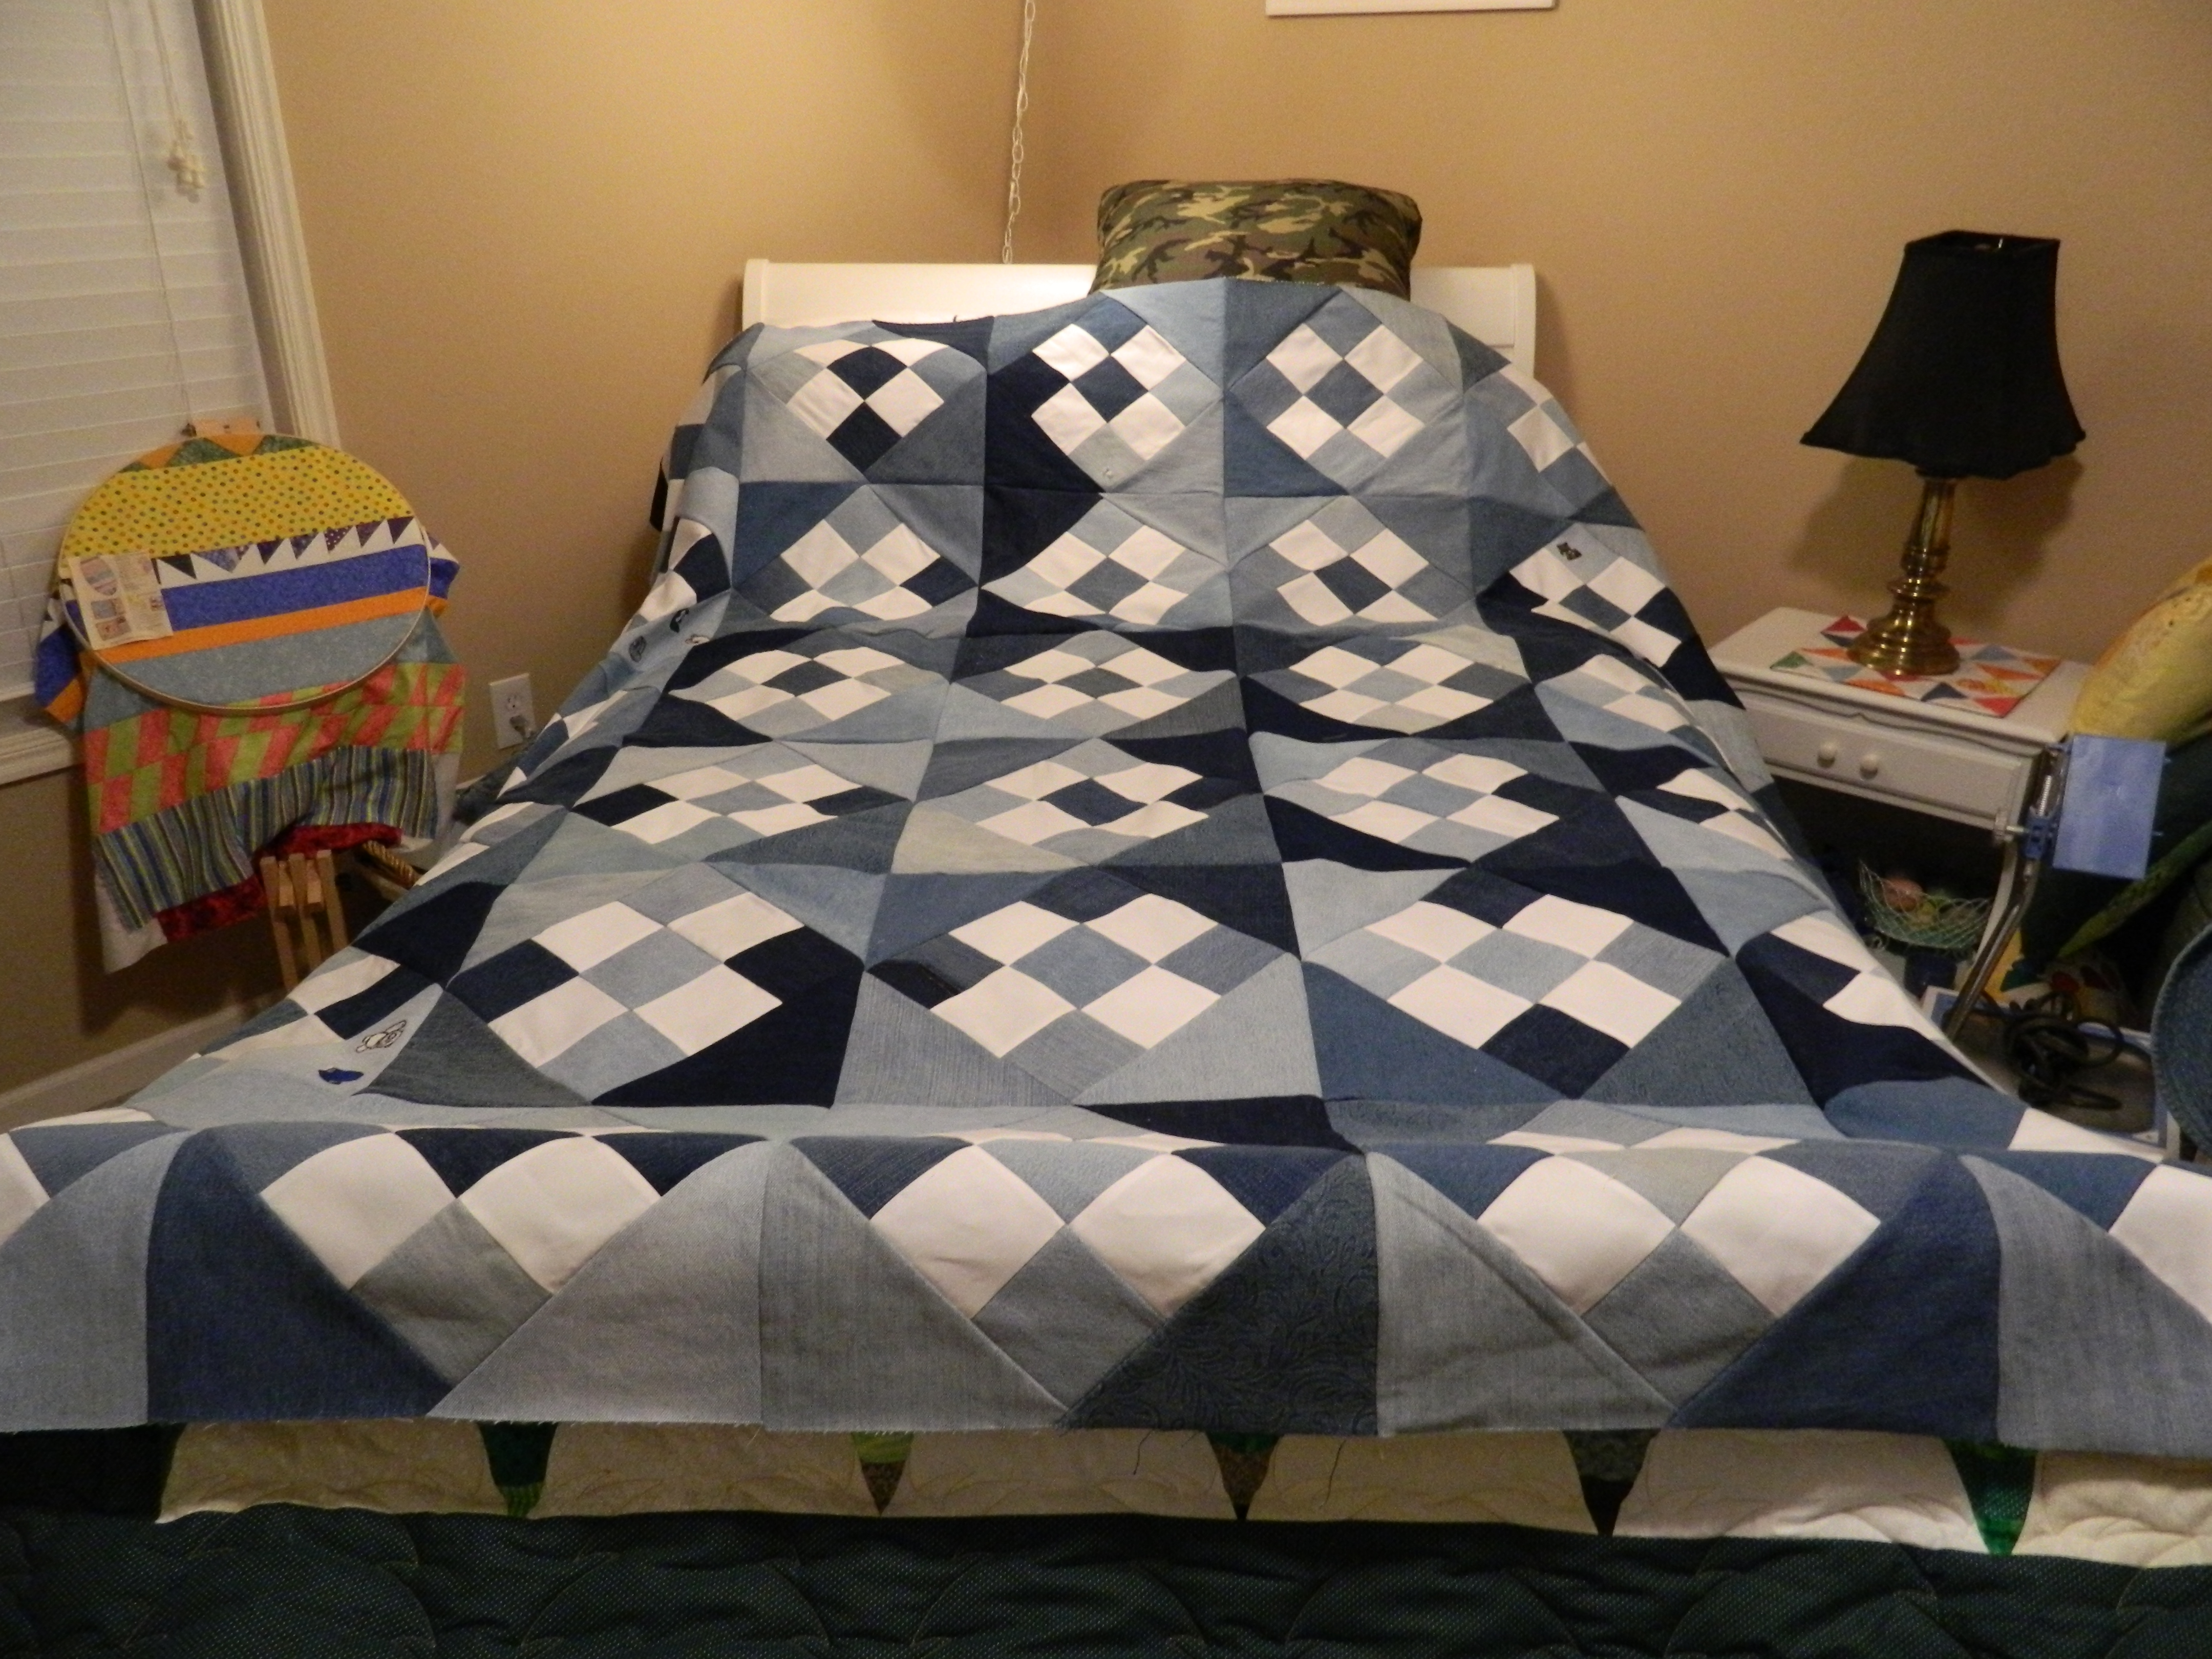
 My experience with making denim quilts is that they are quite warm without the inclusion of batting. And they are quite heavy without the added weight. Now I just have to lay my hands on funding for the top stitching!! (I haven’t forgotten you Becky!)
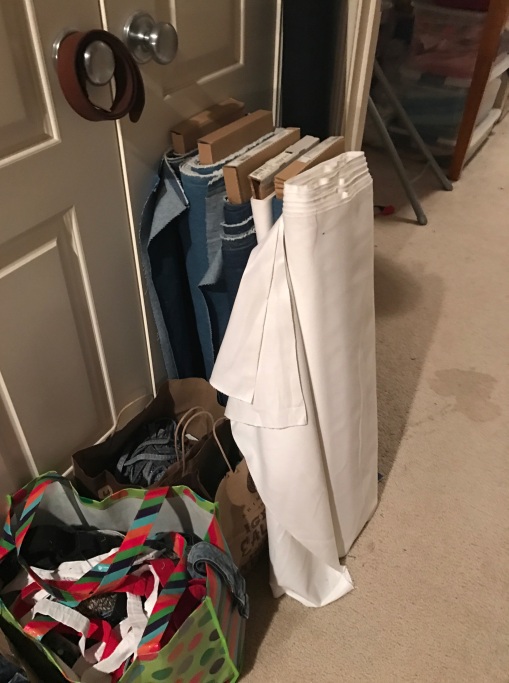 You may have noted that I have spilled out of the sewing room into the hall. In addition to the denim (still on bolts!) I also have some remaining waistbands that are intended for some projects in the way of handbags and backpack designs that I want to try. Waste not, want not!
 Nothing can make more threads and dust like denim though. There is blue dust all over the house!
 So, this is 10 x 10 squares that measure 10″. I’ve started the sashing between, so far I have ten strips of 10, so the next step is to create the sashing between the long strips. I could not do this without my son’s help. These are very heavy quilts! Since they were assembled onto muslin, it may not require a backing and it might be too big for long arm quilting machine, so the muslin backing may be enough.
 I wish I could go back and take ALL the stretchy denim out, but it would be way too much work at this point. I won’t make that mistake going forward!